New Relic Pixie Workshop > New Relic One and Pixie > Deploy New Relic's Kubernetes integration with Pixie
Deploy New Relic's Kubernetes integration with Pixie
Install Pixie
Pixie can be deployed alongside New Relic’s Kubernetes Integration using the New Relic One guided install:
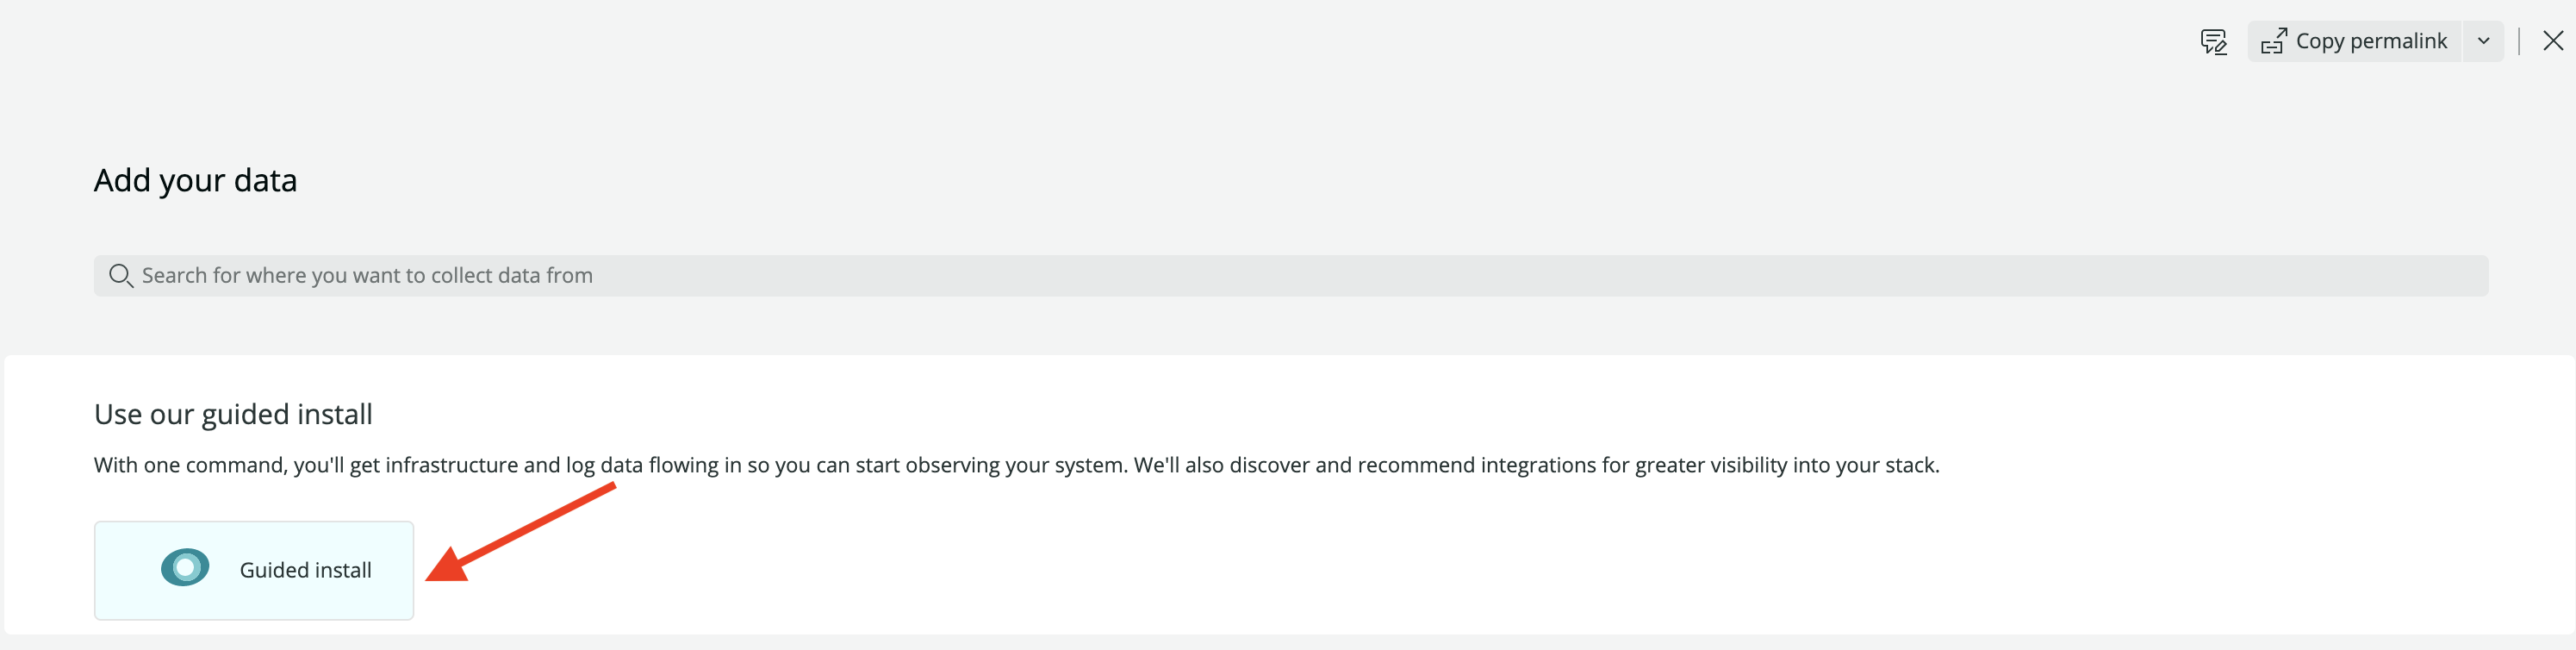
- Navigate to your New Relic One homepage
- Click on the green Add more data button at the top right hand side of your screen

- Click on Guided install
- Select your New Relic account from the dropdown box, and then click the Continue button

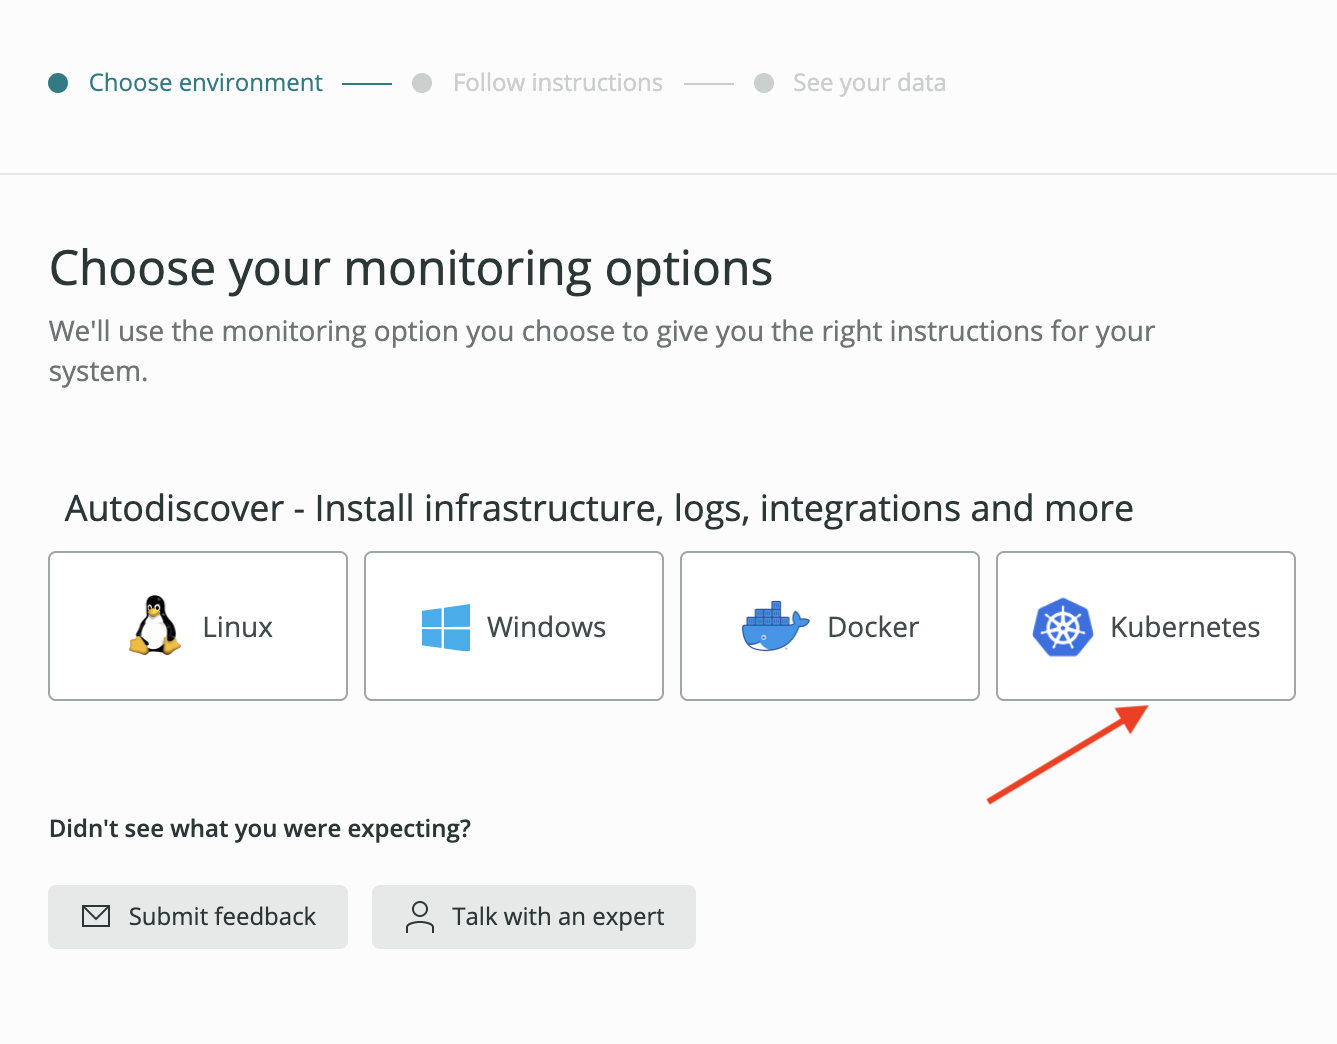
- Click the Kubernetes button
- Enter
tinyhatsas the name of your cluster, and then click the Continue button:

If you have instrumented other Kubernetes clusters in your New Relic account, you will need to first click on the Instrument new cluster link before being able to enter a cluster name.
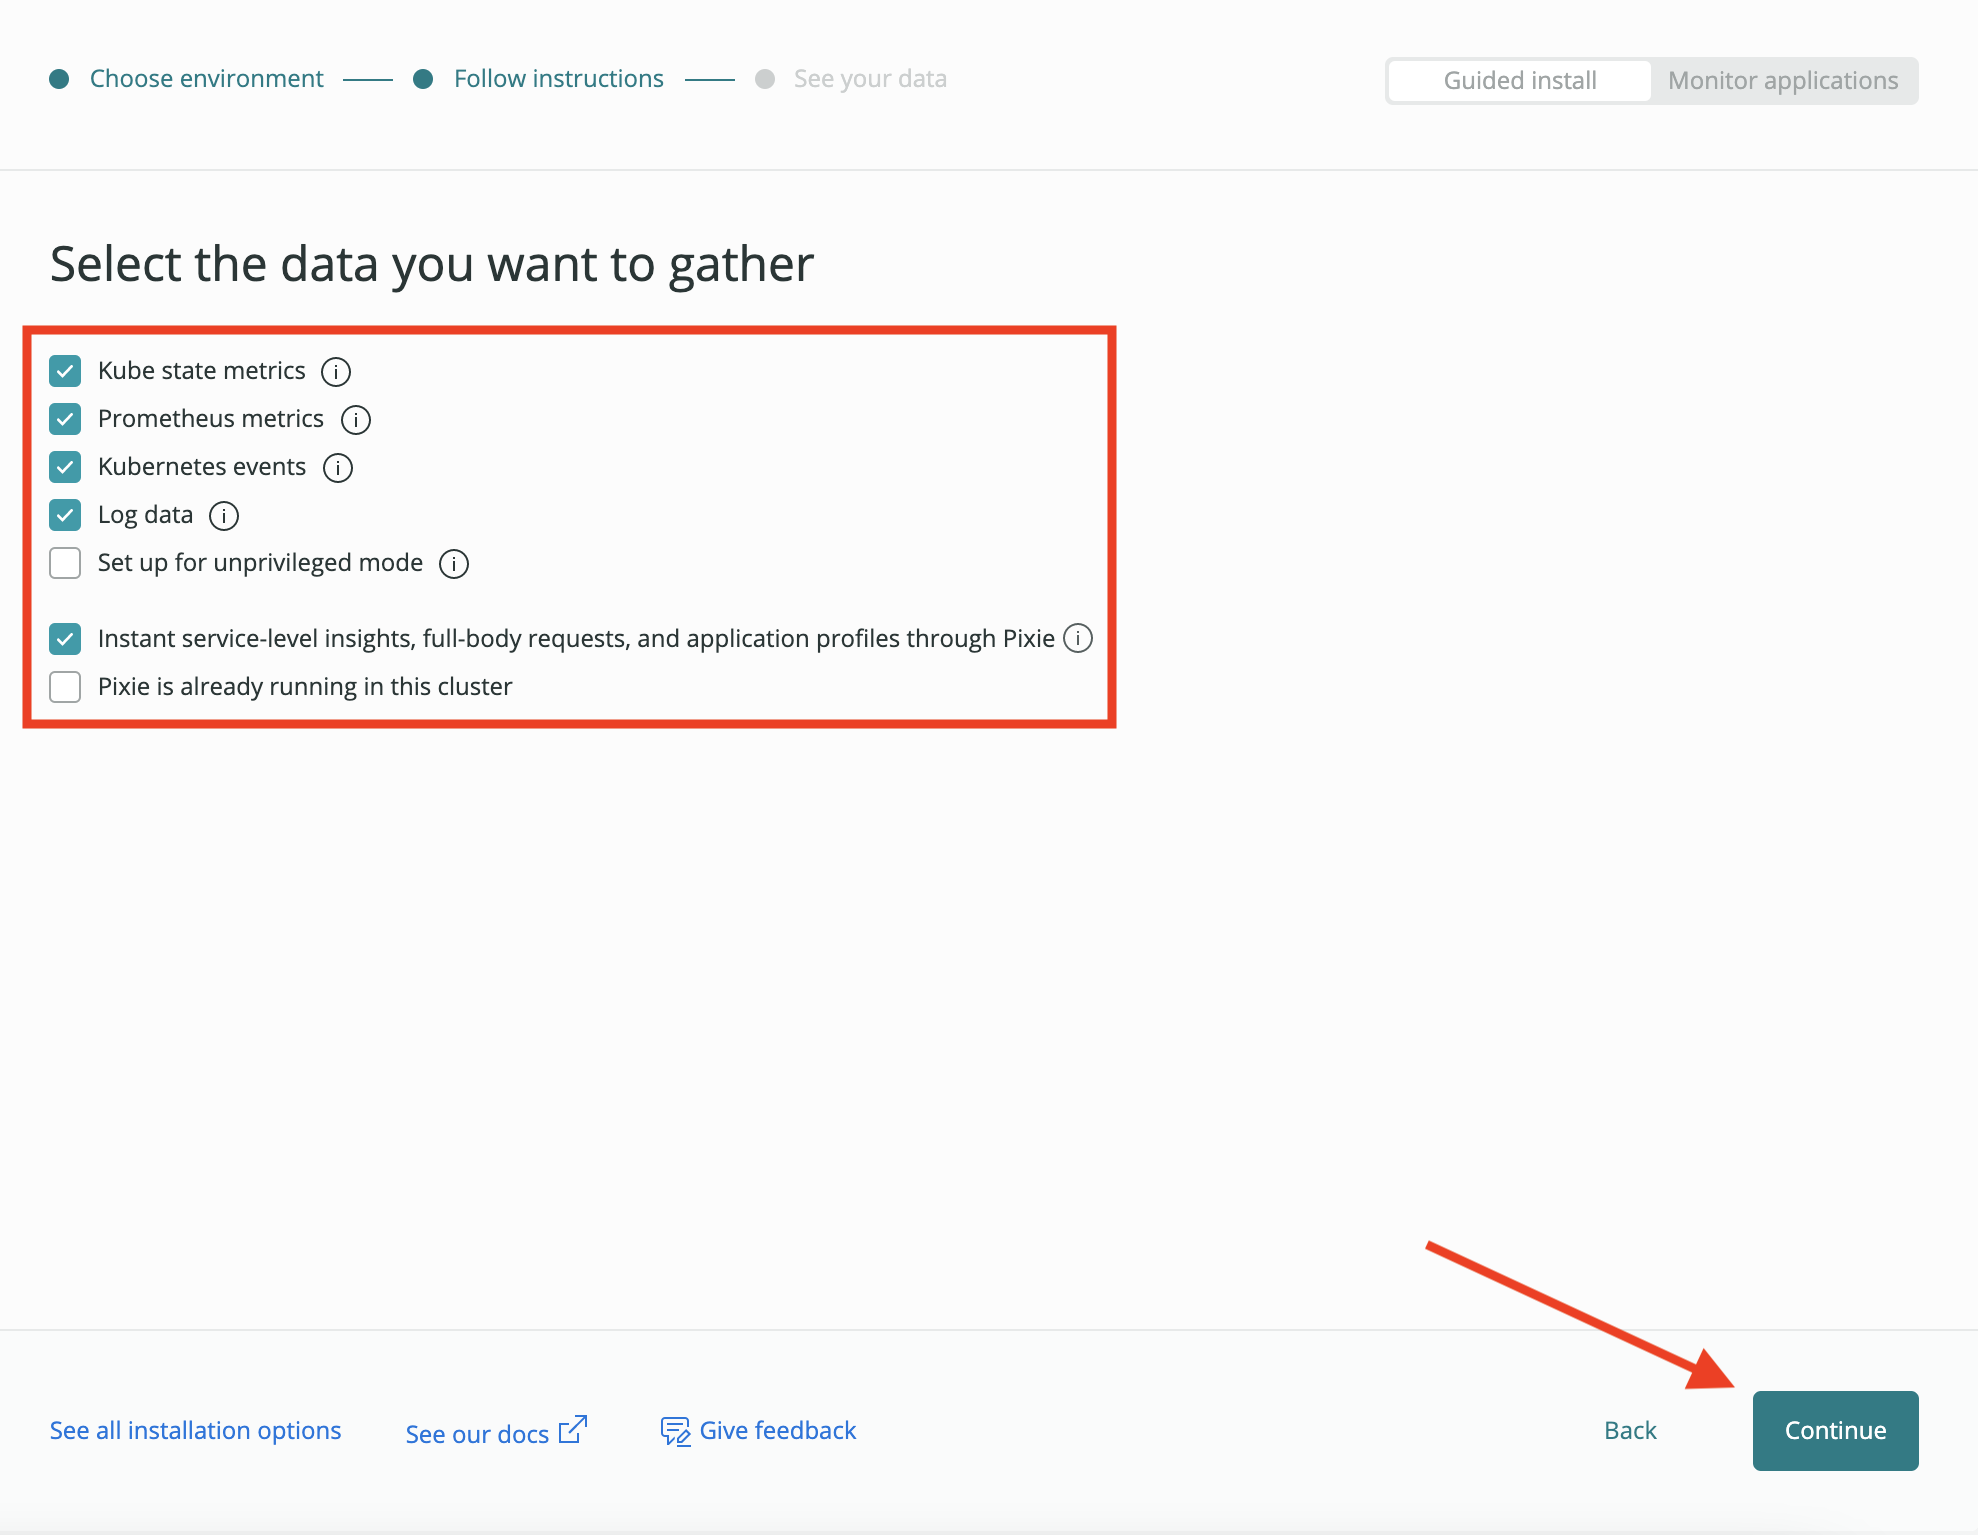
- Ensure the options selected match those in the image below:
- Copy the command and paste it into the shell of your Cloud9 environment:

Deploying Pixie will take about 5 minutes.
- Check if the Pixie components have been deployed:
kubectl get pods -n newrelic
You should see output similar to below. All pods should be ready and available before proceeding.
- Back in your New Relic One tab, click the Continue button. If your cluster was instrumented successfully, you should see the following message:
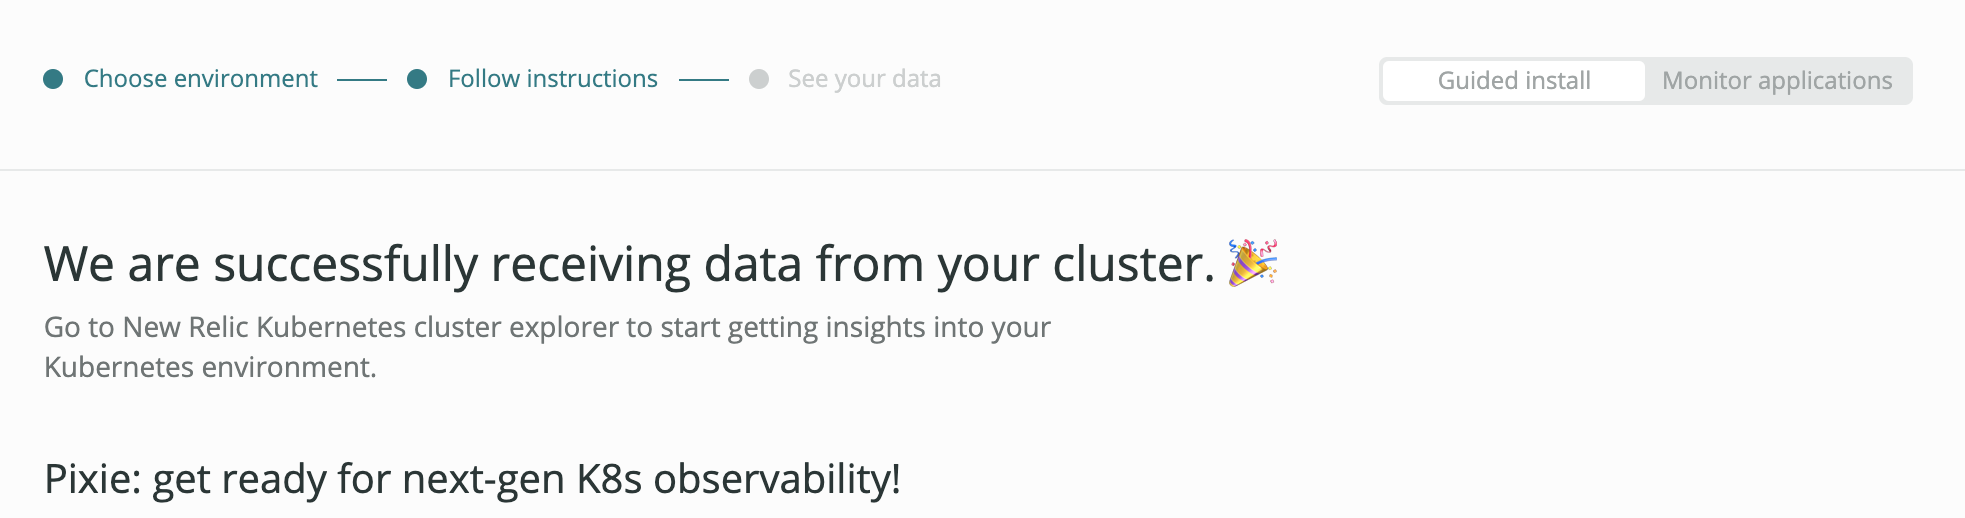
Congratulations! You have successfully instrumented your EKS cluster with both the New Relic Kubernetes integration and New Relic’s Pixie!