APM Agent Deployment
With New Relic’s Java agent, you can track everything from performance issues to tiny errors within your code. New Relic’s Java agent monitors your Java app and provides visibility into the behavior of your JVM. After installing, you will be able to quickly monitor transactions, dive deep into errors, and more.
There are two required files for installation:
First, push the application to the CodeCommit repo. The following sets a new origin for the application repo to CodeCommit unicorn-store, configures a credential helper needed for CodeCommit, and pushes the source code to the repo. This step is necessary for an automated pipeline as CodeBuild will build the application directly from this repo.
cd ~/environment/modernization-workshop/
git remote set-url origin https://git-codecommit.us-west-2.amazonaws.com/v1/repos/modernization-workshop
git config --global credential.helper '!aws codecommit credential-helper $@'
git config --global credential.UseHttpPath true
git push origin master
If successful, you should see a similar message to the one below.
Next, download the newrelic.jar file:
cd ~/environment/modernization-workshop/java-app
wget https://download.newrelic.com/newrelic/java-agent/newrelic-agent/current/newrelic.jar
Then, download the newrelic.yml configuration file:
wget https://bit.ly/31P1Wkn -O newrelic.yml
You will need to modify the configuration file to include your New Relic license key.
To obtain your license key, login to http://one.newrelic.com, click on your name in the top right-hand corner of the page, and then click on Account Settings:

You are now ready to edit the New Relic configuration file using the built-in Cloud9 editor. First, click on Open from the File menu:

Then, click on newrelic.yml:

This will open the newrelic.yml configuration file as seen below:

Simply replace the text <%= license_key %> that is located between the single quotes with your actual license key and save the file:

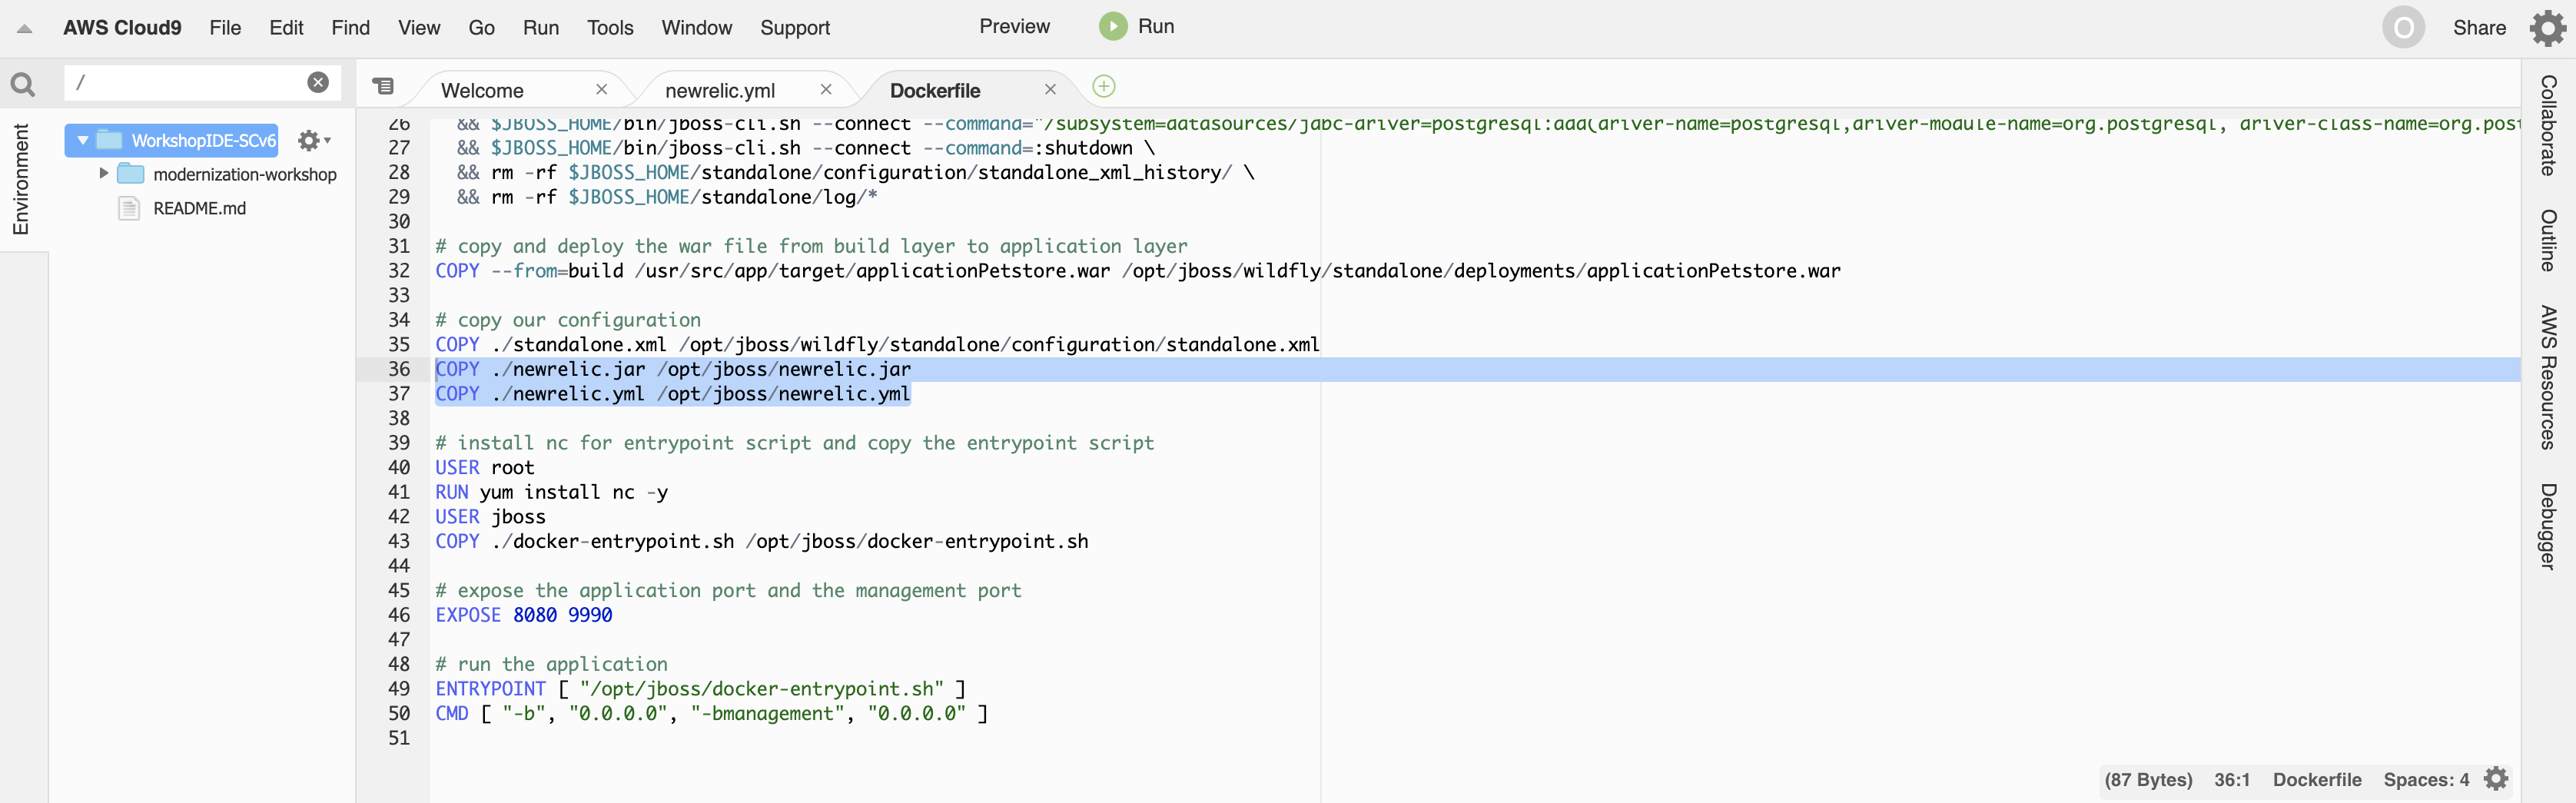
Next, you will need to add the following two lines to the Dockerfile to include the New Relic APM agent in future application builds:
COPY ./newrelic.jar /opt/jboss/newrelic.jar
COPY ./newrelic.yml /opt/jboss/newrelic.yml
Add these two lines at the bottom of the configuration section as shown below and save the file:
Lastly, you will need to add the following line before the final line in docker-entrypoint.sh to ensure the New Relic APM agent is launched alongside the application:
export JAVA_OPTS="-server -Xms64m -Xmx512m -XX:MetaspaceSize=96M -XX:MaxMetaspaceSize=256m -Djava.net.preferIPv4Stack=true -Djboss.modules.system.pkgs=org.jboss.byteman -Djava.awt.headless=true -javaagent:/opt/jboss/newrelic.jar"
It should look like the image below:

You are now ready to commit your changes to have your application built to include the New Relic APM agent:
cd ~/environment/modernization-workshop/
git rm java-app --cached
rm -rf .git/modules/java-app/
git add java-app
git commit -m "Added New Relic APM agent"
git push origin master